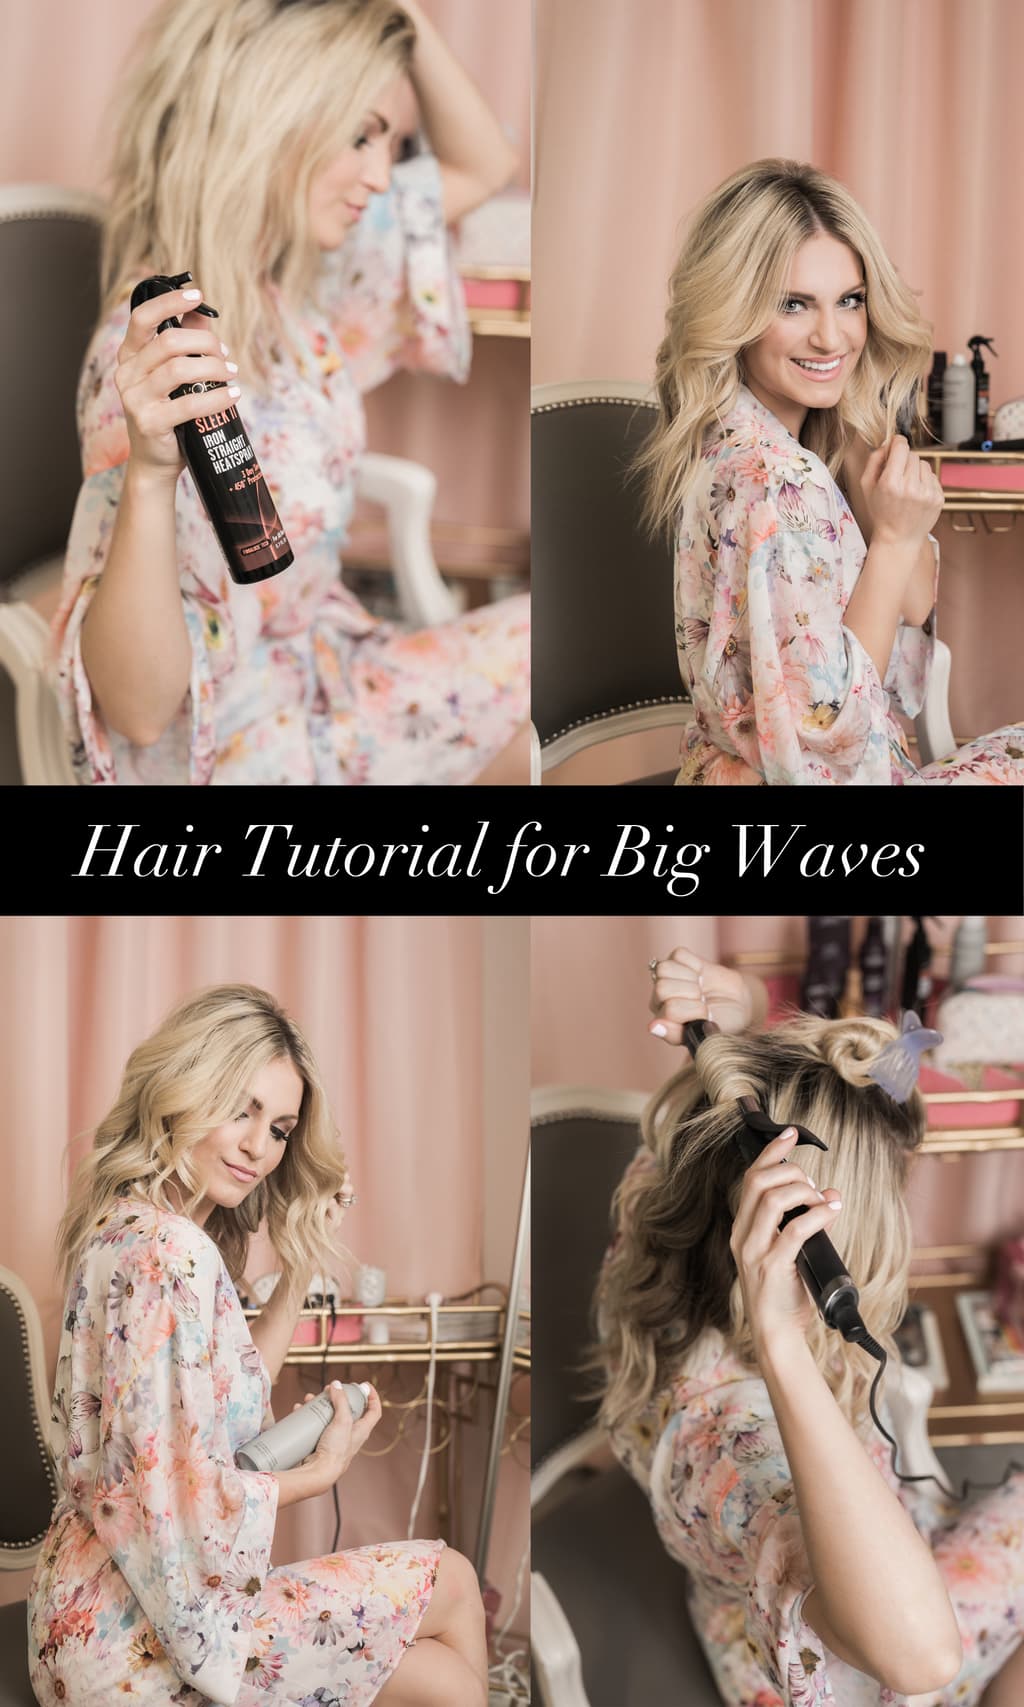
Heat up those curling irons and grab your teasing comb girlfriends, today we are talking all about how I get my signature big waves. I’ve done bits and pieces of tutorials here and there, but hopefully in this post you can find all the little tricks to making this look your own.

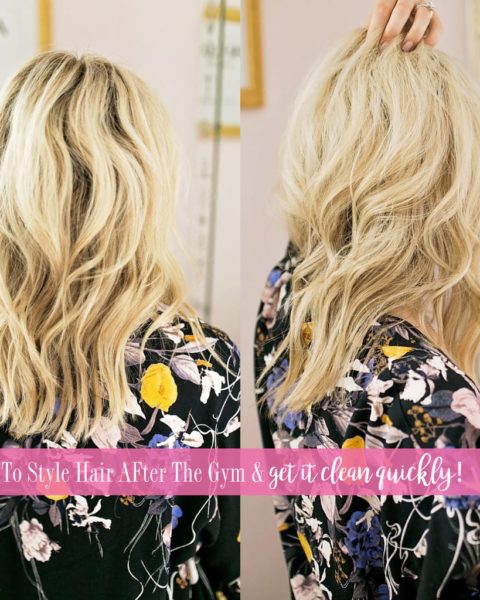
I start nearly every single hair post talking about my natural texture as you’ve got to know what you are working with! For this shoot, I allowed my hair to air dry and slept on it/didn’t do anything to it for 2 days. As you can see there’s a lot of curl and wave underneath and the top layer is just kind of flat. There was a bit more wave to it, but after sleeping on it for 2 days it was far more calm. I do have coarser hair and that helps to hold a curl, but I’ve got one product I’ll share later that’s great even if you have baby-fine locks.
I also didn’t get a highlight for this post. Now, the perfectionist in me is like, “This looks a mess!” but I had a reason for it. I experienced postpartum hair loss like most other moms. It started around month 4, month 5 I swore I’d lose it all and it slowed down by month 6. I think by month 8 I didn’t ‘dread’ showering anymore. When the postpartum hair loss started I refused to get a full highlight as I didn’t want to damage what I was already losing. I started to use one product when Maxi was around 9/10 months and I got SO much new growth from it- which you can see in this post. I chose to shoot the day before my full highlight so you can get an accurate idea of how much new growth came in. I just didn’t feel it would be fair to say, “Hi, this works! No, you can’t see how much it works.“
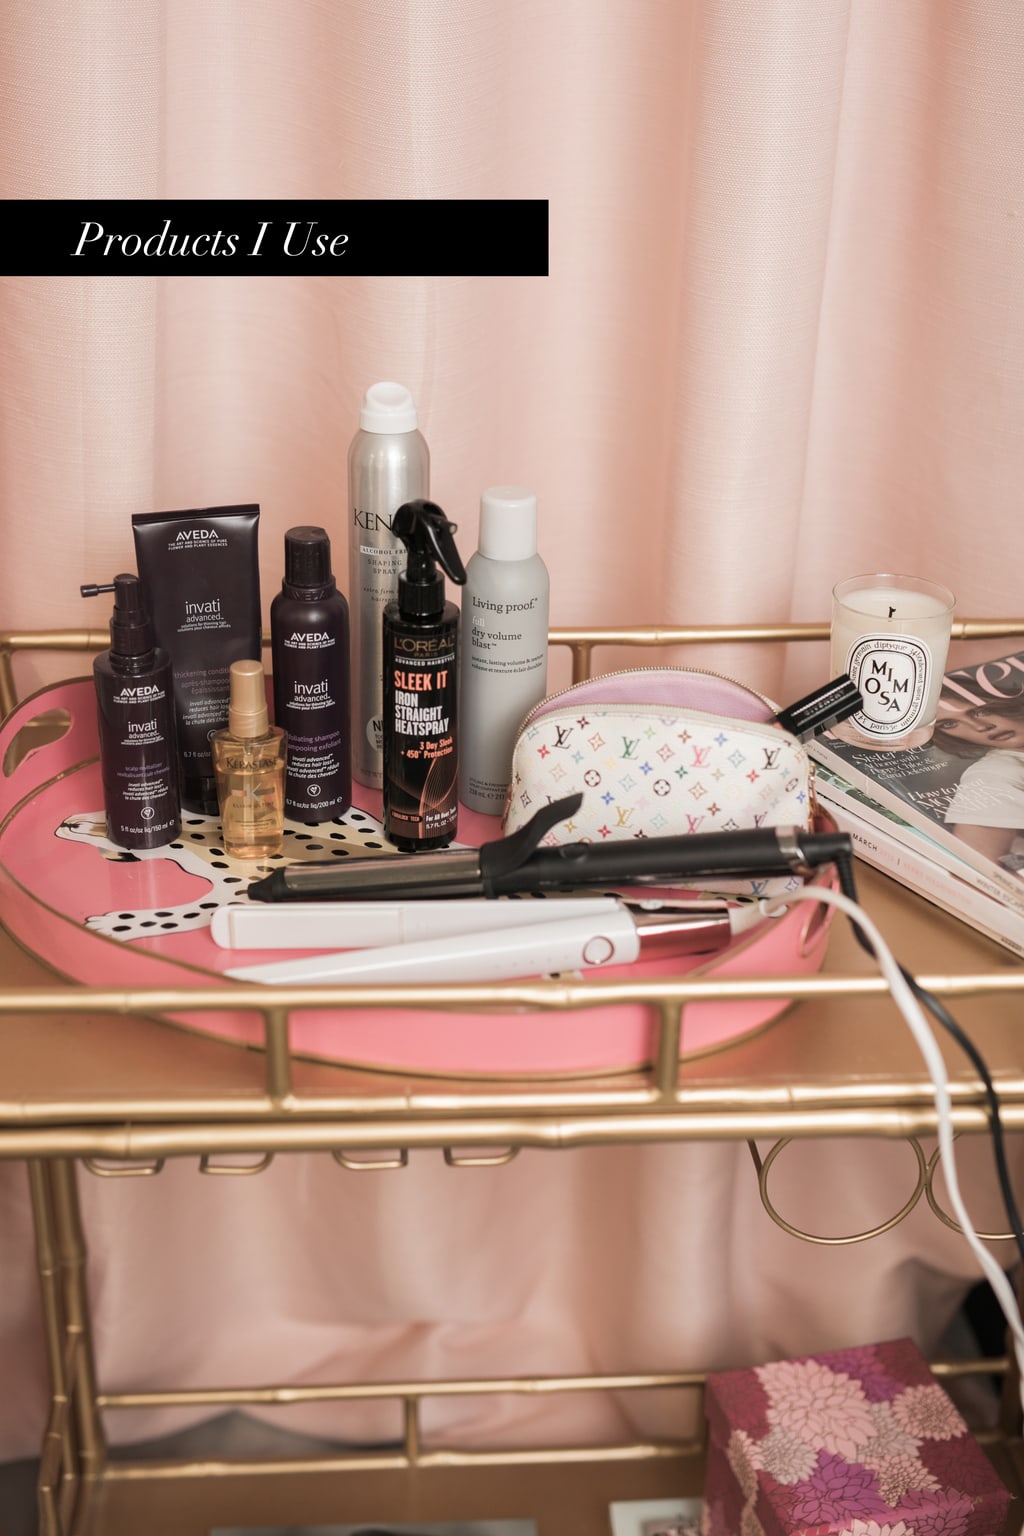
- Aveda Invati: THIS is the magical unicorn product that gets you from crying in the shower to, “Babe, look at all this new hair!” Now of course, you can’t really prevent postpartum hair loss. You can keep taking your prenatals and be kind to your hair, but what is going to fall out is going to fall out. But Aveda Invati helped me live without those “wings” you get as it grows back for a year. I had annoying wings for about 6-7 weeks and then it blended with my hair. To accurately test, I used the shampoo, conditioner and spray for 12+ weeks. I think all three work beautifully together, but if you wanted to be consciences of your budget {as it is pricy} you could definitely use the spray as I believe that’s the secret sauce. You apply that morning and night and massage into your hair. I’ll be honest, the first week or so you can feel a bit of texture on your roots- as if you sprayed dry shampoo. Then my hair adapted to it and I didn’t even notice it. What I really loved about the shampoo and conditioner is that it’s not drying at all. I normally avoid volume shampoo/conditioner like the plague because that’s code word for “no moisture to weigh you down.” This was genuinely a great shampoo and conditioner and I didn’t feel like my hair was dry from it. If you just had a baby and are worried about the hair loss, get the spray, girlfriend. Get the spray! Aveda asks that you try this line faithfully for 12 weeks to see maximum results. I would say I saw results in about 6 or 7 weeks. But now that I’ve used for 12+ weeks I can really see a major difference.
- Kerastase Oil: I always use a hair oil at the end to soften any pieces, and Kerastase is a go-to in my book.
- L’Oreal Iron Spray: I am currently using this as a heat protectant after picking it up at Target over the holidays. I really enjoy it! It does say it’s an iron straight spray, but I find it works great with curling and the smell is delish.
- Living Proof Full Dry Volume Blast: I talked about this product in my hair teasing post and have faithfully used it since I had Maxi. This is the secret to the volume and it doesn’t play around. You only have to use the smallest amount of product to get the look you are going for. Because you’re only using a small amount of product one bottle will last you forever! I go through one, maybe two bottles a year.
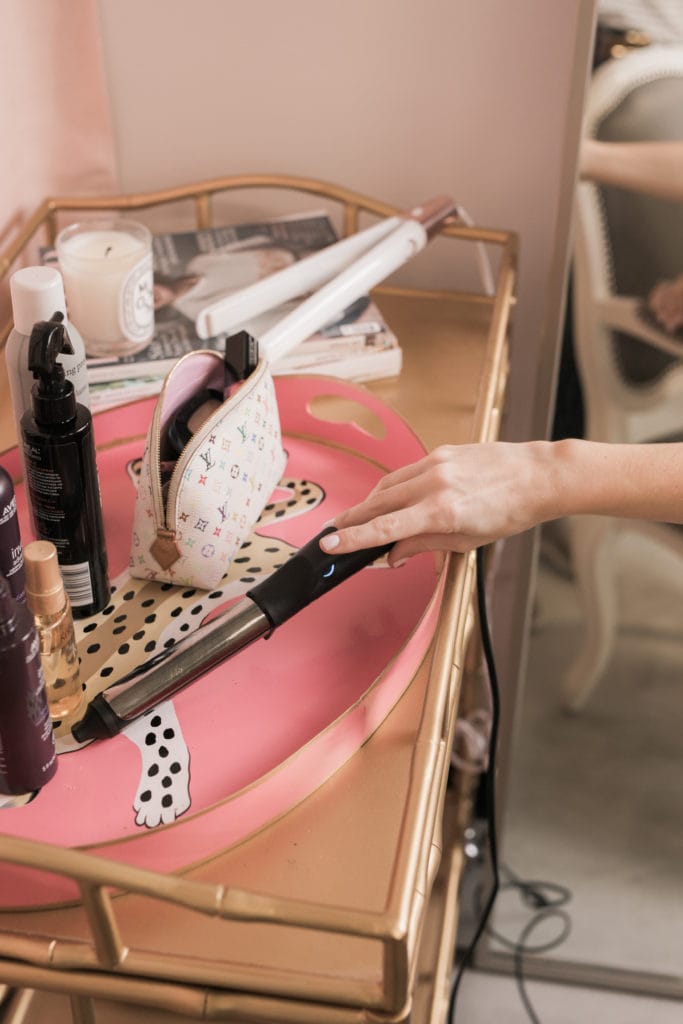
- GHD Curling Iron: I rotate between my T3 and GHD curling irons, almost weekly. They are both great irons, but I’d say for me the biggest difference is the GHD gives me a softer curl and the T3 has a heavier clamp. I also alternate between a 1 inch and a 1.5 inch. I used a 1 inch for this post as that does give me more defined waves. If I’m going for a really loose, messy look I use a 1.5. I’m a curling iron hoarder.
- T3 Straightener: This is the iron I use for any touch ups!
- Kenra Shaping Spray: Kenra products smell SO good- they need to make a perfume. Truly. Paul loves when I use this hairspray and I like that it is easy to work with. I get my Kenra products from Ulta, which you already know I have an unhealthy addiction with.
- Velcro Roller: I have had the same velcro rollers since 2008, but I can’t give them up to replace.
- Teasing Comb: Grab one of these for your hair.
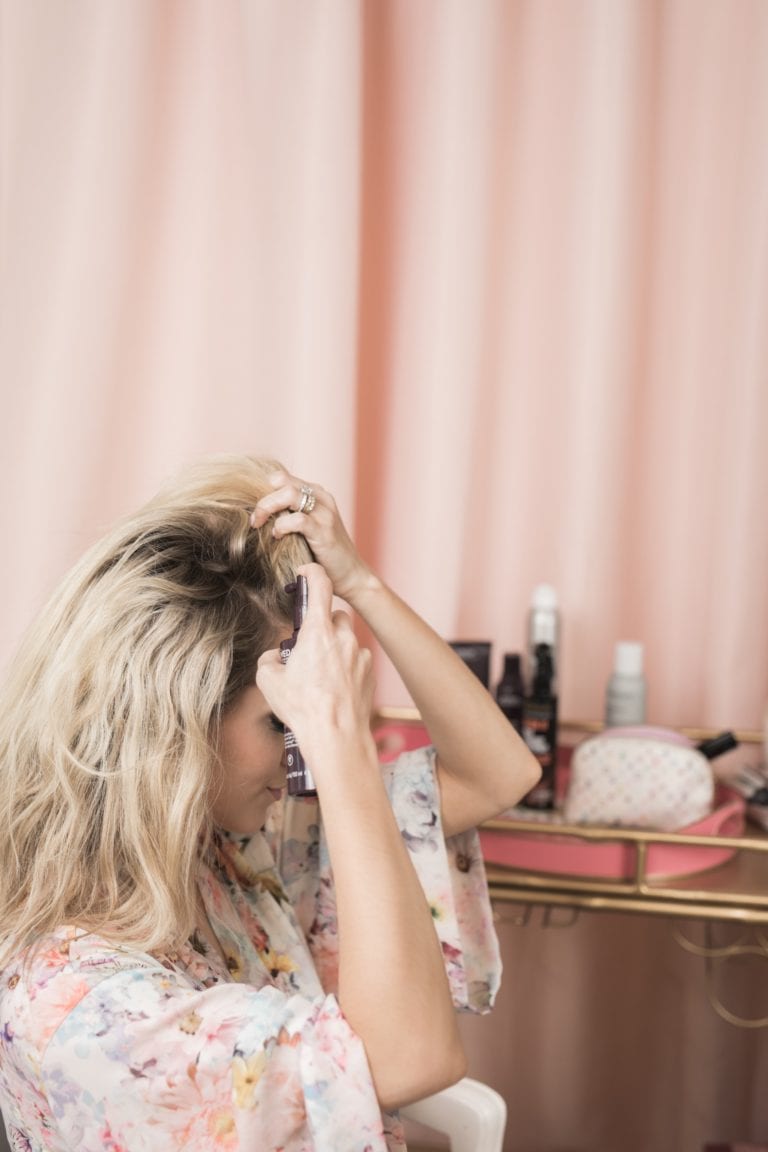
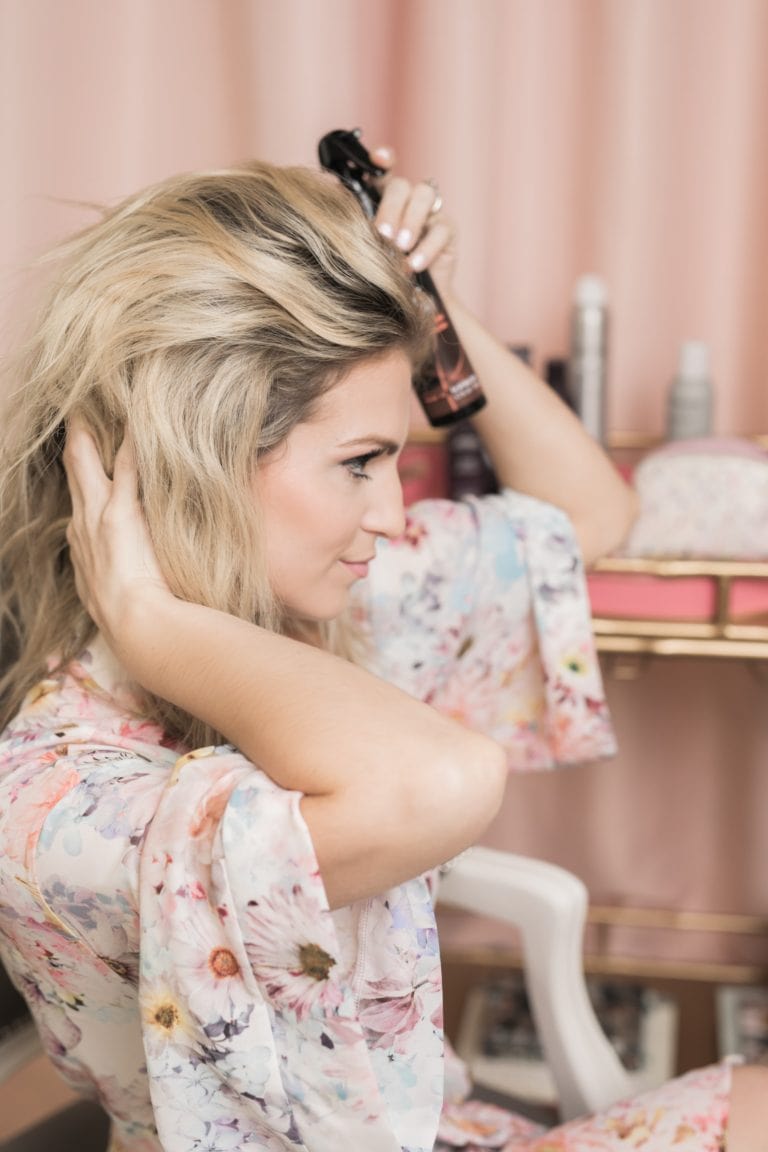
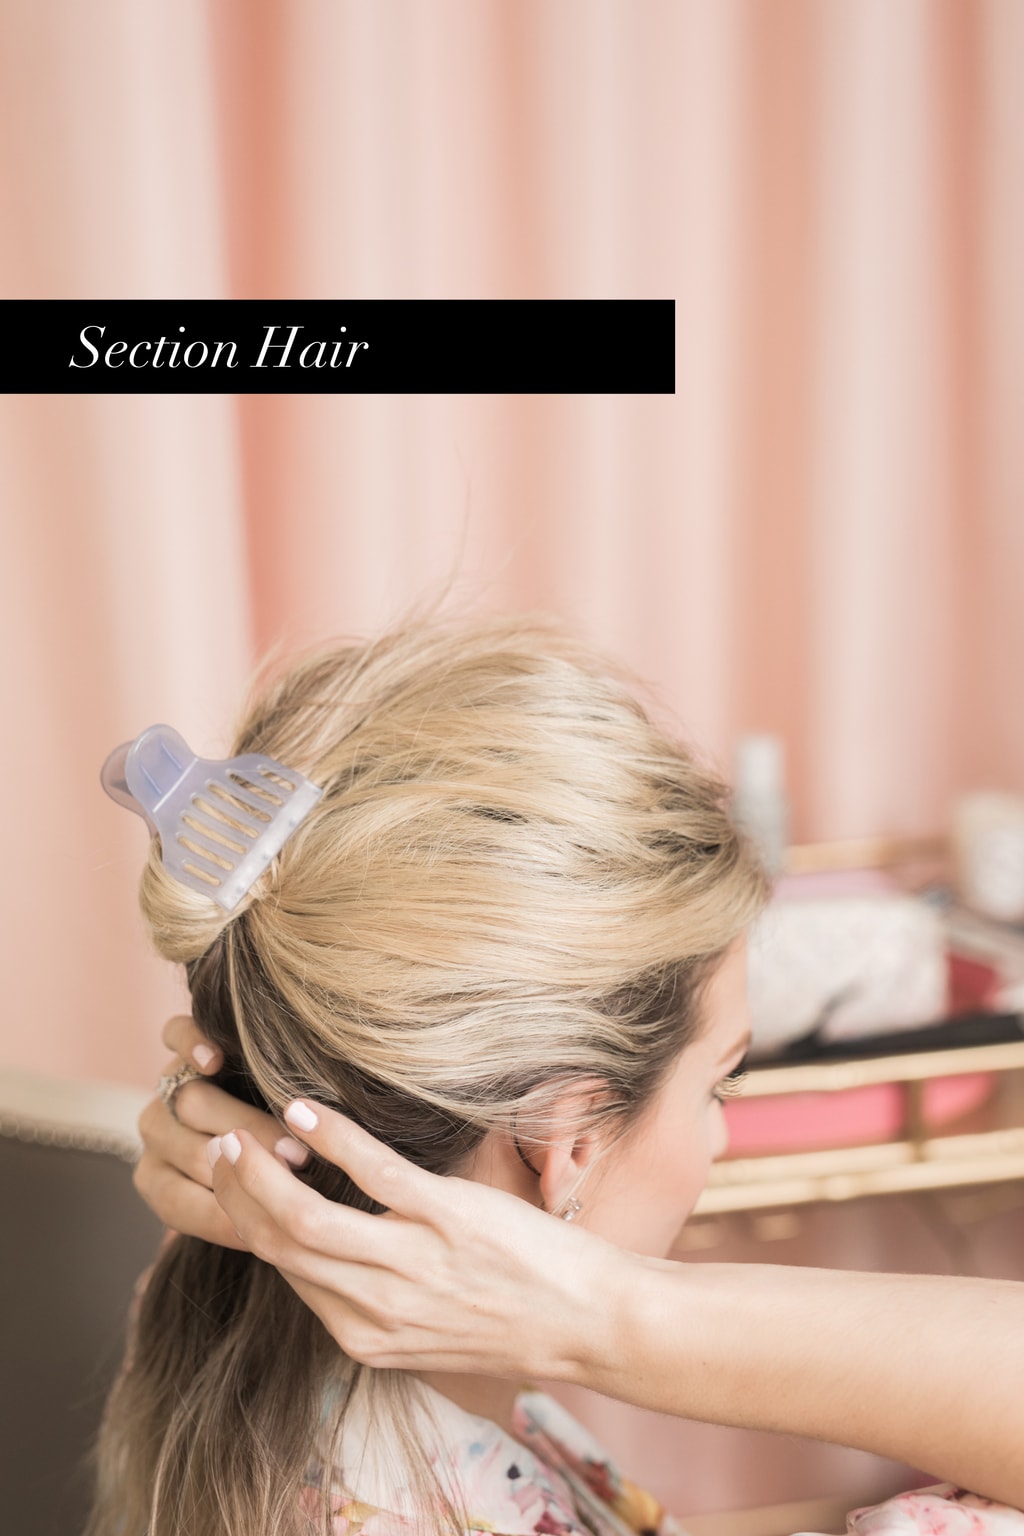
Typically, I’ll start my morning by spraying the Aveda Invati Spray in my roots. Then, I’ll wash my face and do my makeup. I do this so I can allow it to really absorb before I curl my hair. I’ll spray my heat protectant and then section off my hair. As you can see here, I’ve got total dishwater blonde hair {or that’s what every stylist has told me?!}. What age does to blonde hair- it’s not fair, y’all. Not fair, I don’t want to pay to get the color I had when I was younger- ha. But I’ll happily show the new growth in order for you to see how well the Invati line worked for me.
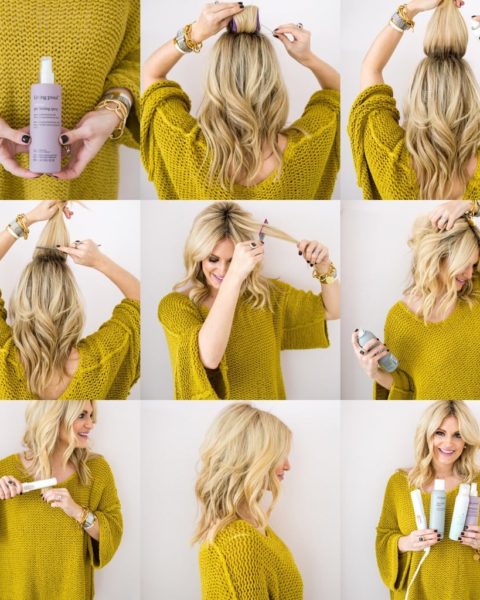
Most of us do curl our hair in the same fashion, as we start at the root and curl down. However, I’ve got 3 tricks for getting the volume you’re going to want- without looking like you are our childhood bff, Shirley.
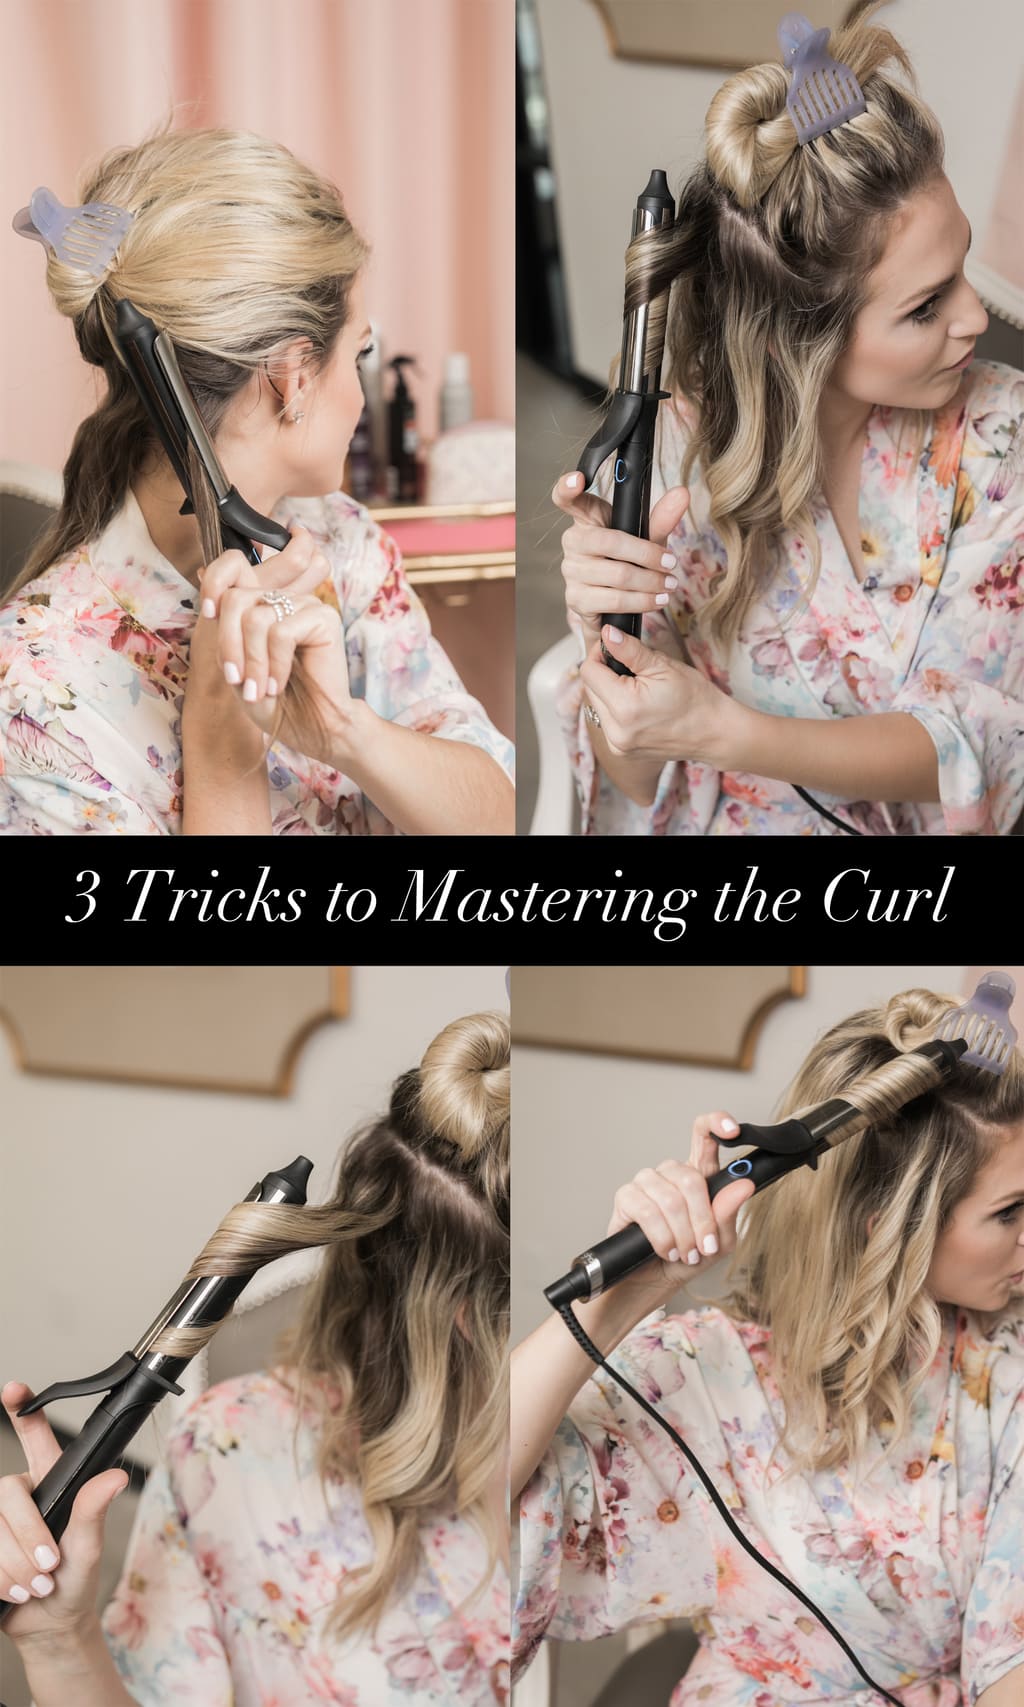
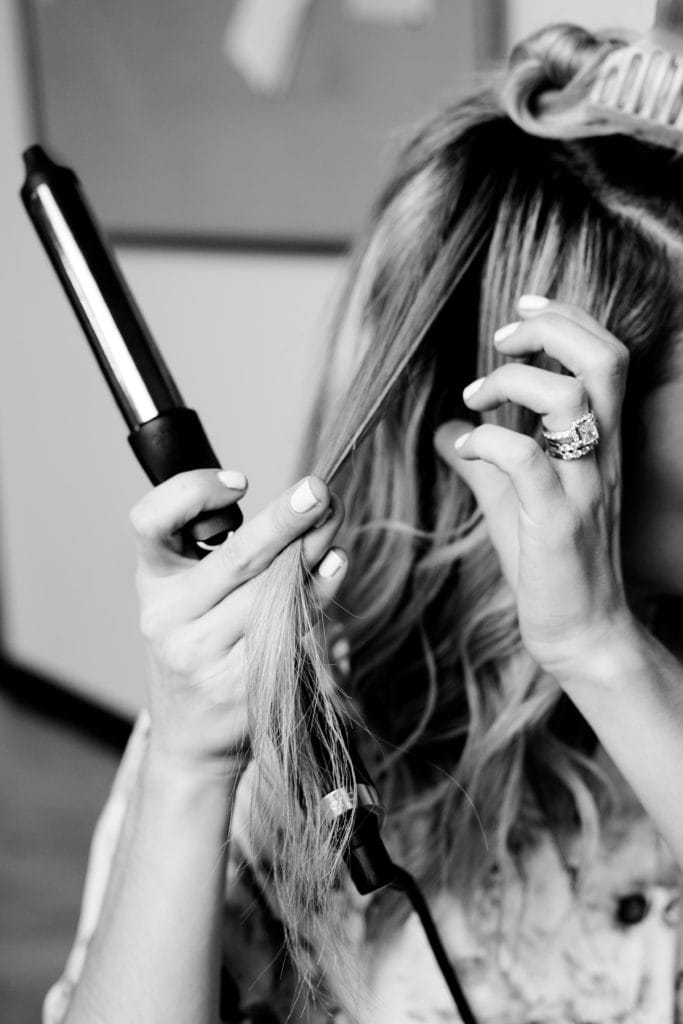
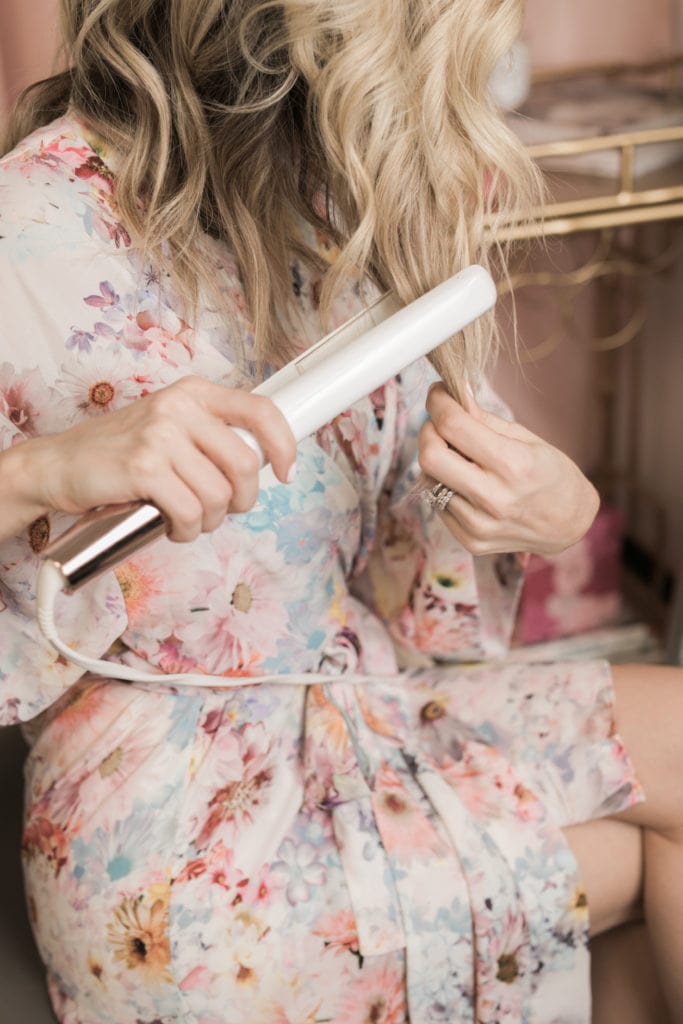
- After you section your hair, grab a 1.5″ piece and clamp at the root. I clamp and smooth the iron over the first 2-3 inches of hair and gently pull down like I’m straightening. If you’ve got curly or wavy hair I think this is truly key. You want the root there to be smooth, without running a flat iron through it and removing all volume. I like the bottom portion of my hair to be more messy and textured, while the roots are smoother. Then once I run through once or twice {don’t run all the way to the bottom- just the first 2-ish inches} I curl going down at a 180 degree angle.
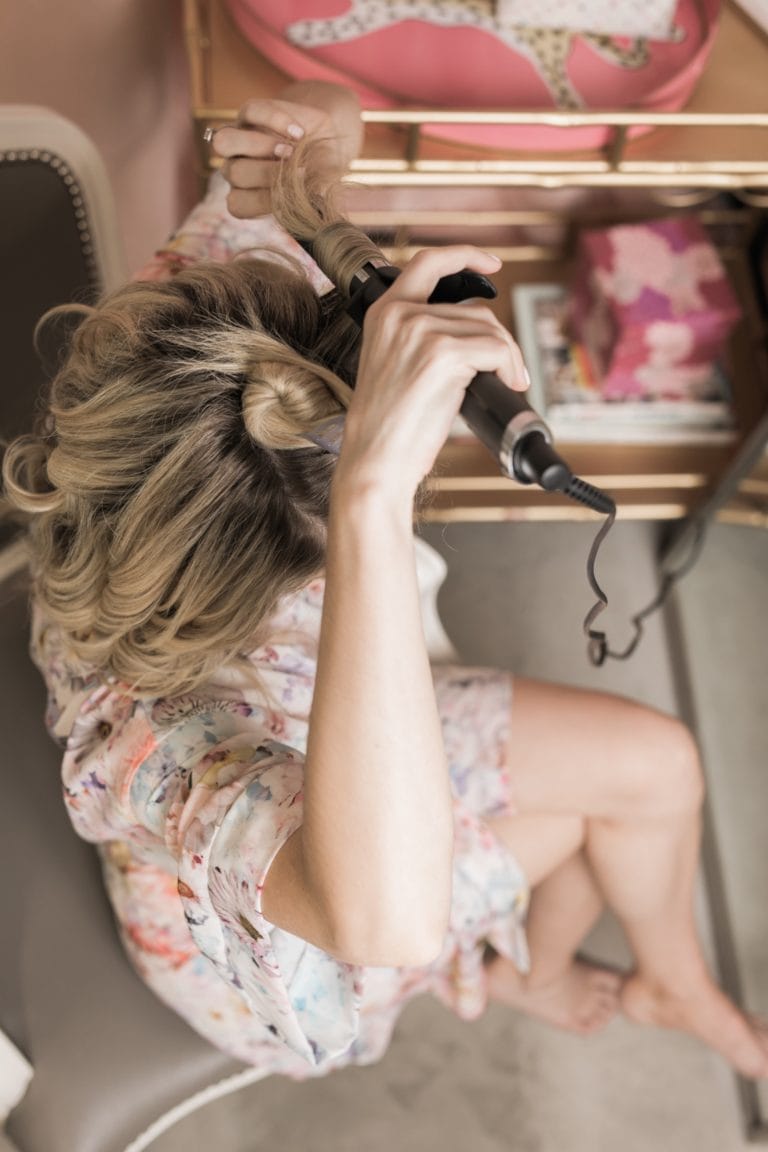
- I curl down at a 180 degree angle but not for the entire curl. That’s just the first half of the curl. As I get to the bottom of the curl, I lift up at a 90 degree angle for volume.
- You can see in the third photo I’m lifting the hair up, BUT leave the bottom inch of your hair out of the iron. This gives you the Victoria Secret wave trick. I repeat, do not curl the bottom inch, leave that out. But as you get to the bottom of your strand, start to lift the curl. In the 4th photo you can see I’m finishing the curl at a 90 degree angle and let it hold for one second. This takes a bit of practice, but the entire curl will be one swift motion and one strand won’t take you more than 6 seconds.
Getting The Curl:
Smooth 1-2x at base of root, curl down at 180 degree angle, leave one inch of hair out, as you reach the bottom of your curl lift hair up at 90 degree angle for volume.
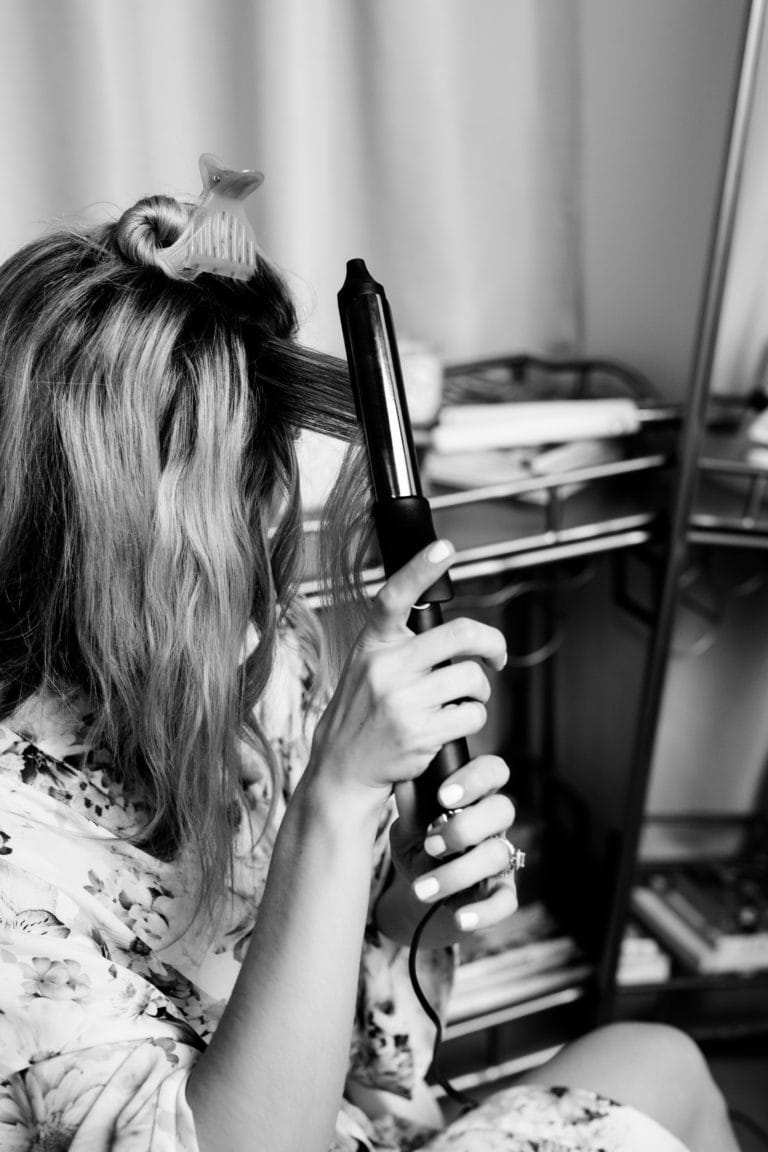
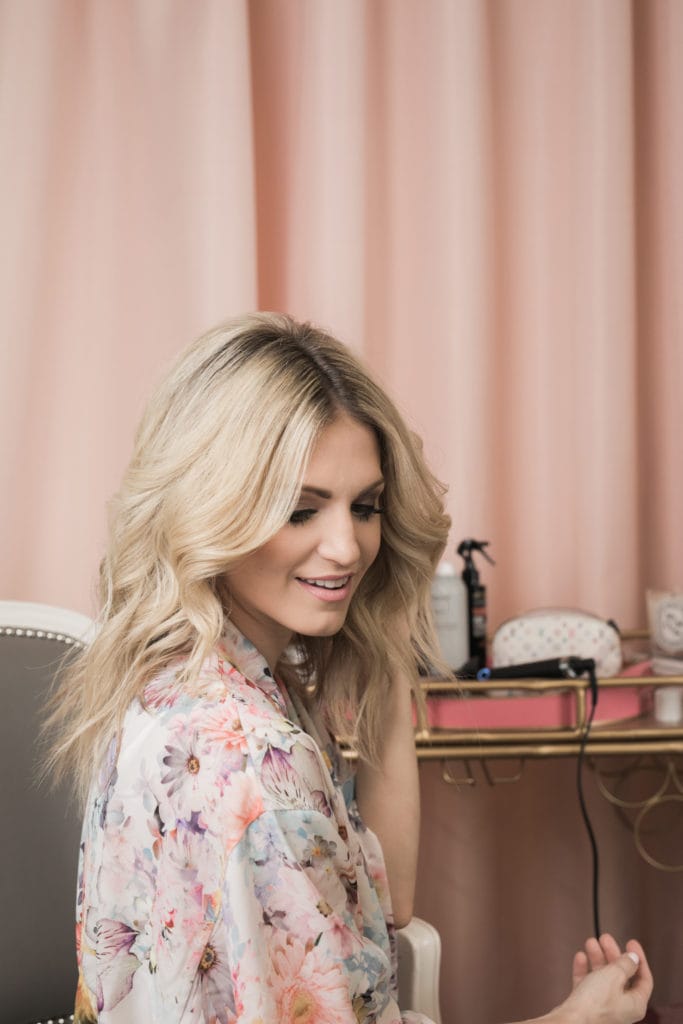
I continue this curl technique all around my hair, but as you frame your face, always curl away from your face- never towards. You can see that directly in this photo. However, as you get to the very top you are about to curl a bit differently for volume purposes.
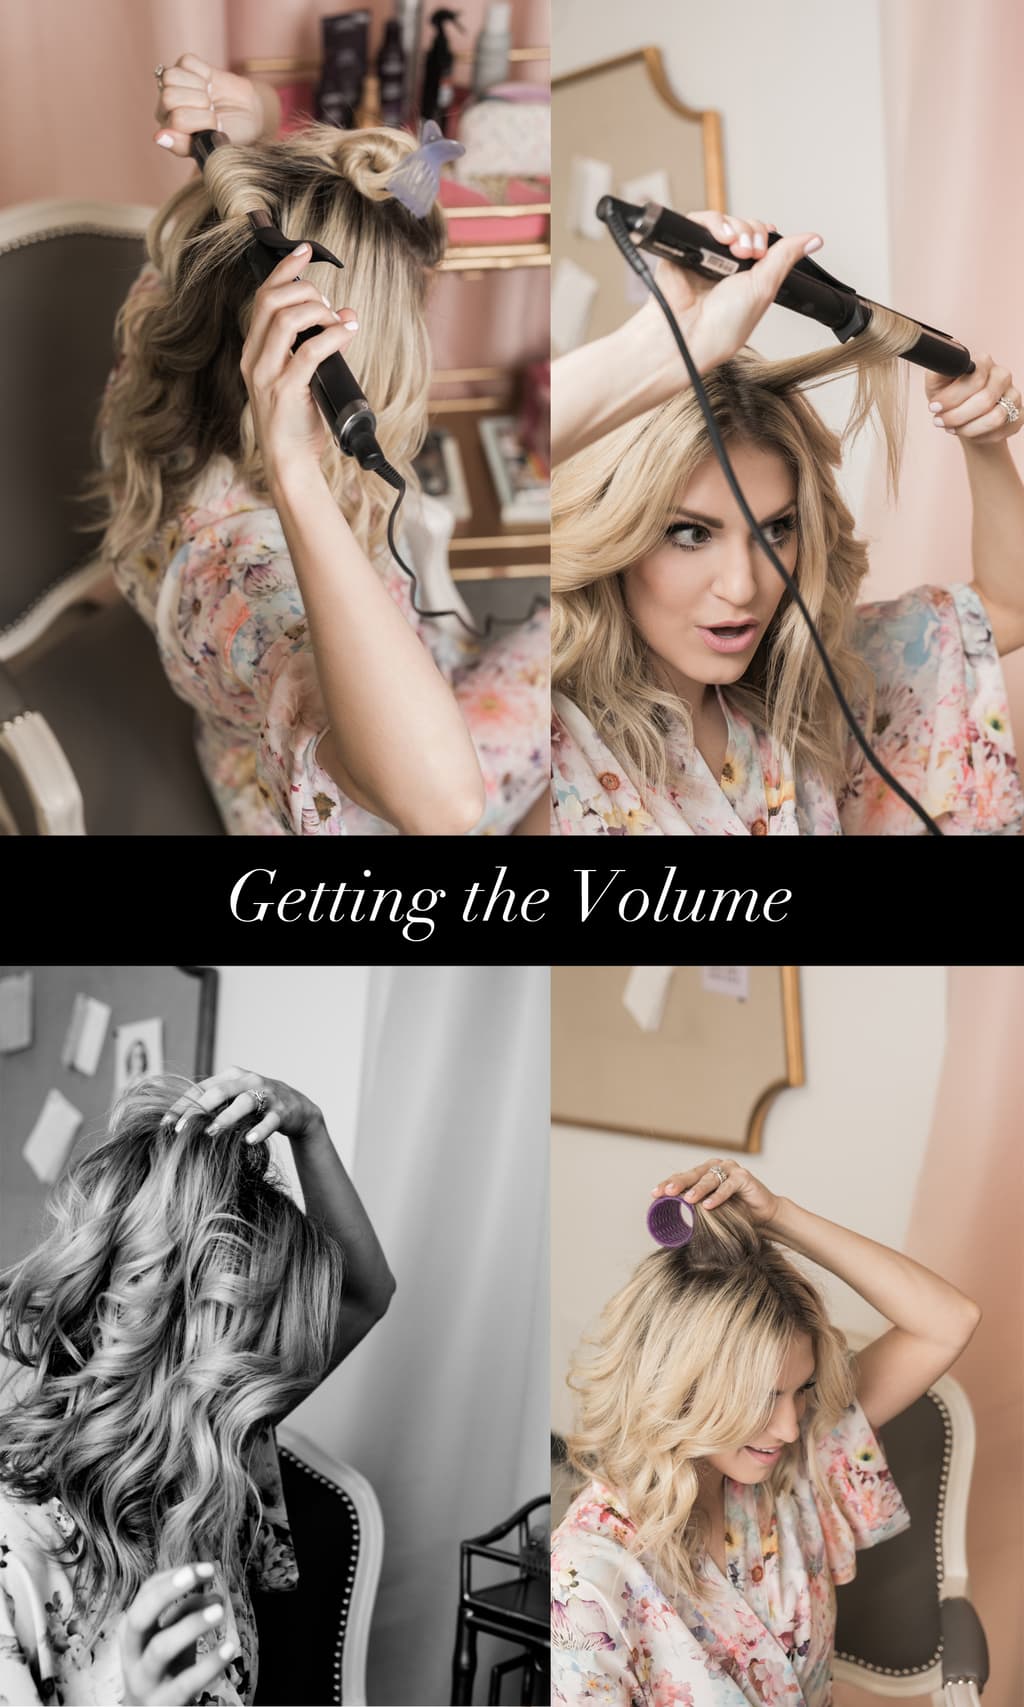
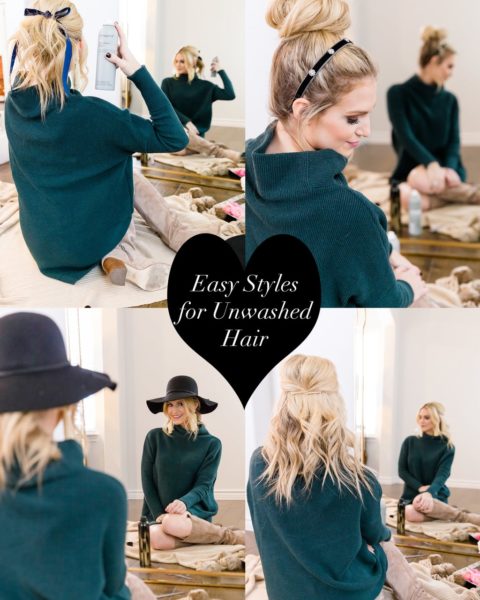
- As you get to the top of your hair {say when you’ve only got about 2 sections of layers left} you want to curl the crown of your hair horizontally as shown in the photos above. This teasing tutorial will help you see that, too. I always curl away from my face and keep that going in the back of my hair. However, at the very end I curl my hair in a horizontal method as I’m going to be putting a velcro roller in and that is what matches the way I insert the roller for volume.
- Continue the same curl technique at the top layer as you curl away from your face and lift.
- Then I shake out the curls a bit and get it a little messy.
- Next, I insert my velcro roller. I’ll let the roller sit while I put on my clothes, get Maxi ready, etc.
Getting the Volume:
Curl crown of head horizontally, curl away from face as you frame your face, use velcro rollers, then tease!
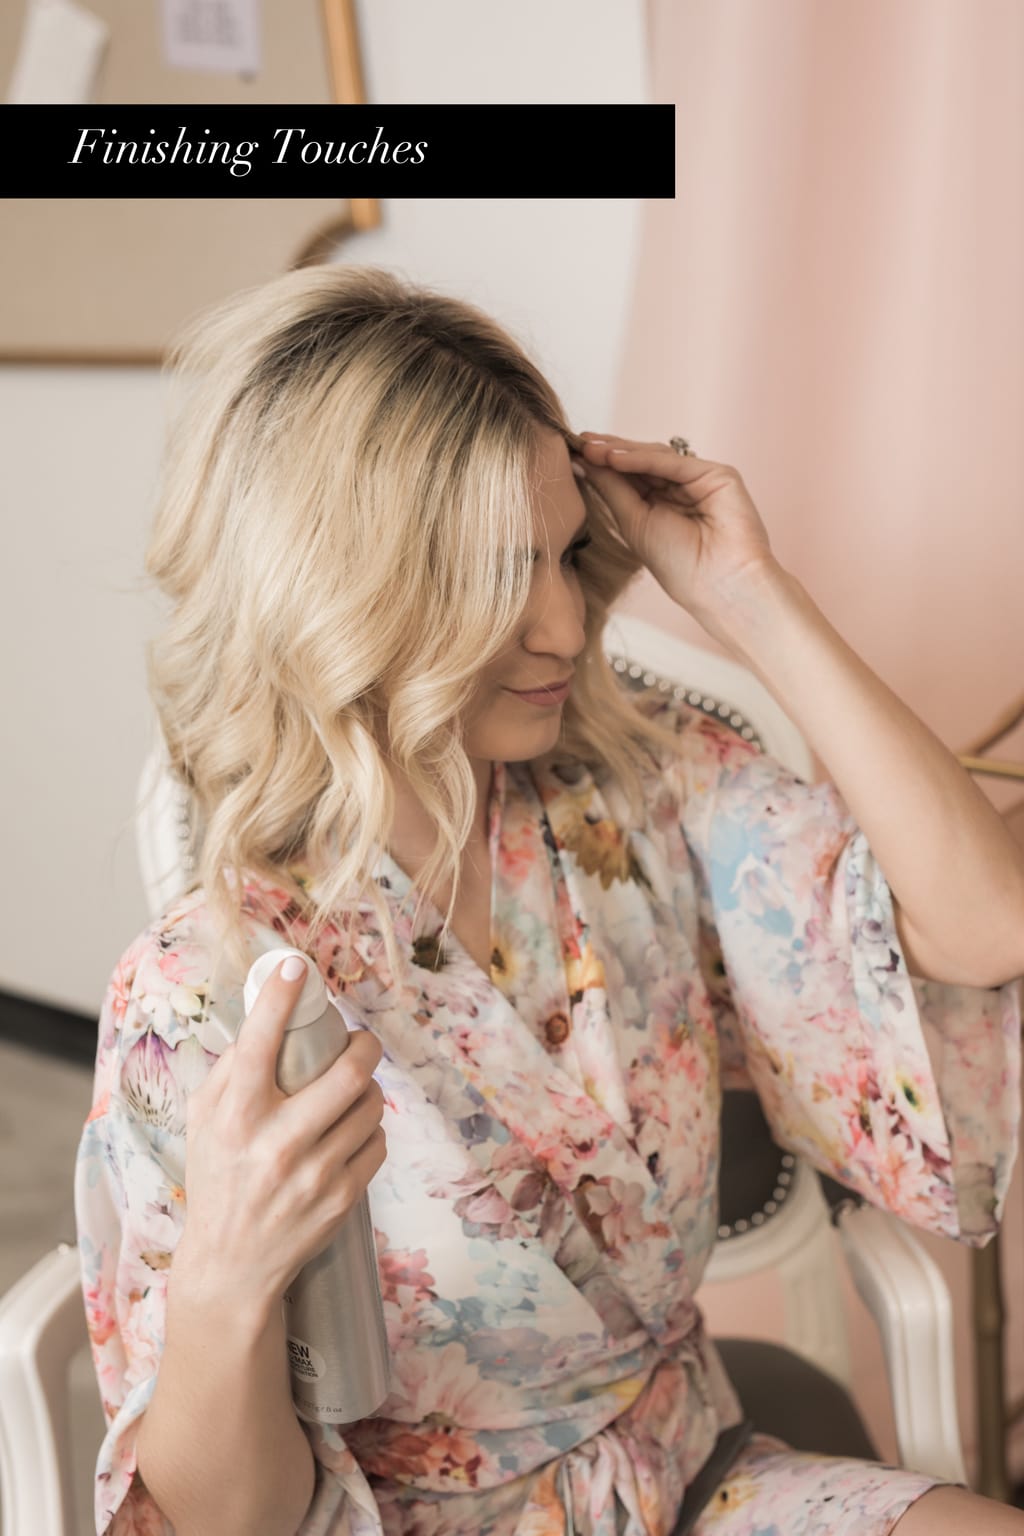
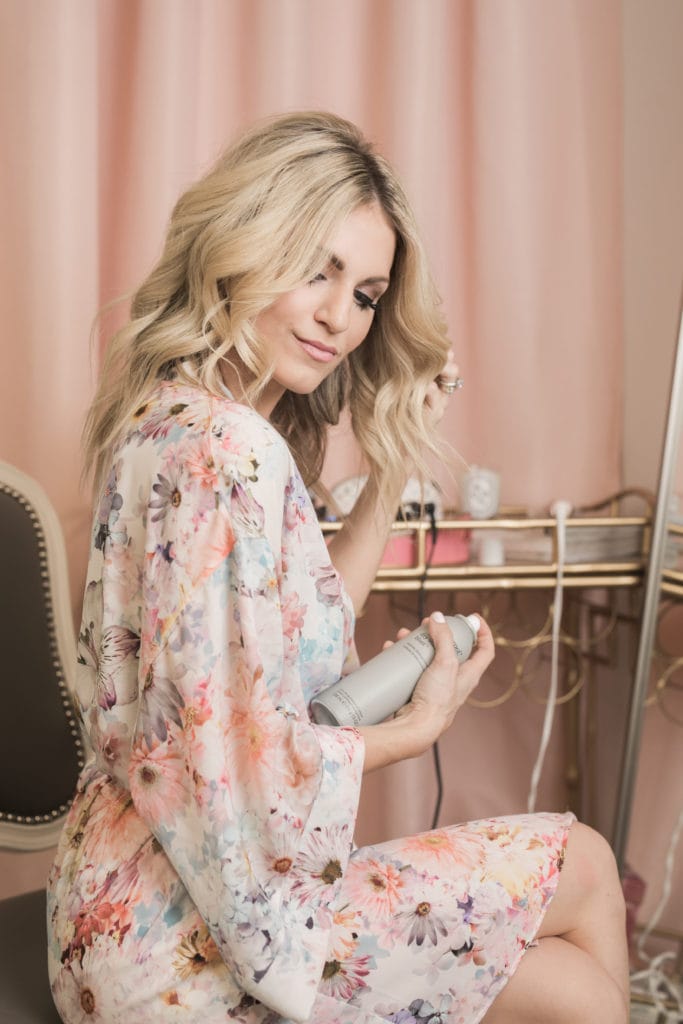
I take the velcro roller out and tease my hair. This post shows exactly how I tease. I didn’t use the Dry Bar product in this post and I did do a bit of a different routine, but it will show you up close the teased sections. I just tease one section in the back at the base, and then one section on either side of my middle part. For this, I used my Kenra Shaping Spray.
At this time, if any pieces accidentally got curled at the bottom of my hair I’ll gently pat the flat iron through the bottom inch. I say “pat” because I don’t do a hard tug as I don’t want it to be this extremely straight piece against the curl.

This is where the volume trick comes in! Once everything is teased and straightened, I take Living Proof Full Dry Volume Blast at an angle and spray up into the hair like in this photo! Everyone is going to use a different amount of this product based on their hair texture, so I’d play around with this on a day you don’t have to go anywhere. Personally, I just do two sprays on each side of my hair, for about 2 seconds.
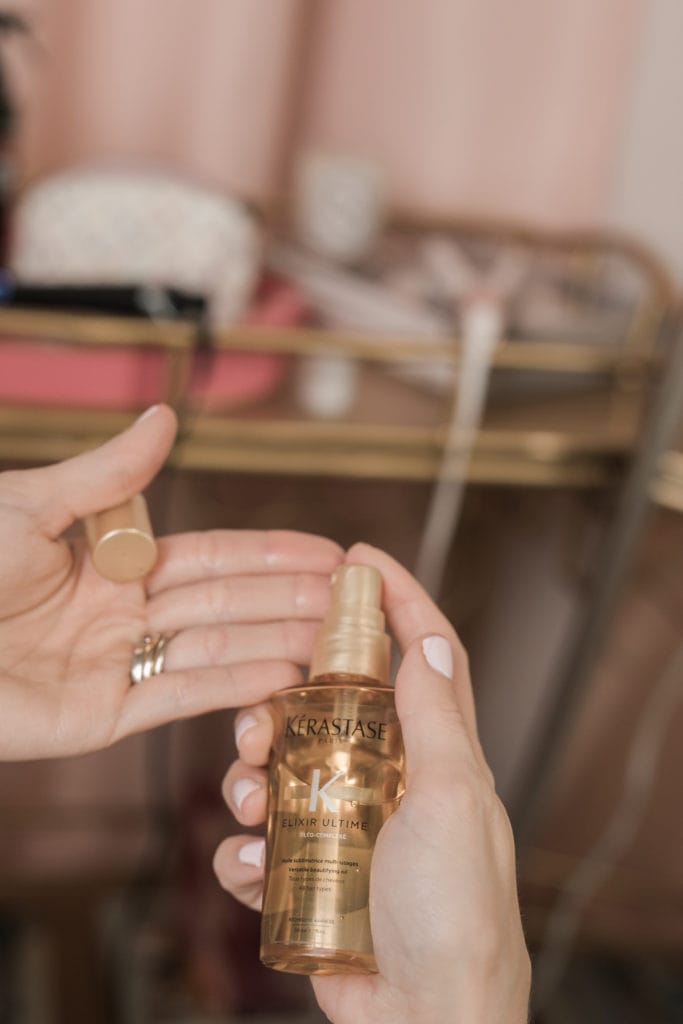
The Living Proof Volume product can feel a bit “product-y” {not a word, but you get it} so then I take my Kerastase Elixir Ultime and run that through the ends of my hair. It gives you “American Girl Doll fresh out of the box” hair softness.
You’re finished! Enjoy your waves for days as I think this style just gets better the longer you let it go!


Aveda Invati Line {Aveda let me test this line} | Kerastase Oil | Heat Protectant | Living Proof Full Dry Volume Blast | Curling Iron | Straightener | Hairspray | Velcro Rollers | Teasing Comb | Similar Robe {Same brand} | Leopard Tray
Photography by: Carmen Evans
More Posts on my Hair:
- Teasing Tutorial
- Crown Braid Tutorial
- All About Hair -> Includes my stylists’ details!

I never doubt your hair tutorials because your hair is always stunning, always on point! The curl is lovely 🙂 and I use Kerastase Oil too, it’s a lifesaver! 😀
Charmaine Ng | Architecture & Lifestyle Blog
http://charmainenyw.com
Ahhh love this so much! I’ve been looking forward to this post, your hair always looks perfect. Thank you for sharing!
Your robe is soooo so pretty! And love the way your curls always look <3
BlondieintheCity.com
I appreciate this post so much! I had my baby girl 4 months ago and am now experiencing the post partum hair loss – ugh! And I was wondering what in the world to do?! Do you happen to know if the Aveda products are okay to use while nursing? (So random but just figured I’d ask)
Thank you!
Hi Christina!
Congratulations on your sweet little girl!! Oh no! I do not. 🙁 I’m so sorry! My best best would be to call an Aveda salon as they sell the Invati line there and I bet they would know. I wish I could be of more help with that!
xo,
Katey
Do you brush your curls out at all?
Hi Caitlin! I just kind of shake them out and hand brush them, but not with an actual brush. I hope that helps! xo
I am going to have to pick up some of the Living Proof Full Dry Volume Blast. I have such fine hair!
Thanks for the tips!
You literally have the best hair ever!!! I am 37 weeks pregnant, and I have heard all the horror stories about losing your hair after baby. I am saving this post so I know what to buy!
xxoo
Mary
http://www.BelleONTrend.com
lovely healthy hair.
wil invest in the products..
Thank you for posting this! I’ve been waiting for your review of the Aveda Invati line 🙂 Do you use the spray morning and night of all “non-hair-washing-days?” I’ve been afraid of what it might do on day three or four, so I’ve only been using it on hair washing day because I didn’t know if it would affect my dry shampoo.
Hi Janet! I do tend to taper it on day 3 and 4 and maybe only do morning! I hope that helps! xo
will invest in buying quality products..lovely hair
Hi Katie, kind of late seeing this post. How often to you curl your hair per week? How often do you trim your hair? And, you have breakage and damage from your heat Tools?
Hi Nicole! I would say I curl two or three times a week! I get a trim about every 4 months and my stylist doesn’t mention anything about breakage from heat tools. I think curling hair is a little less damaging than a straightener because you aren’t “pulling” your hair. But I know I must hhave some damage from bleach and from heat tools! xx, Katey