
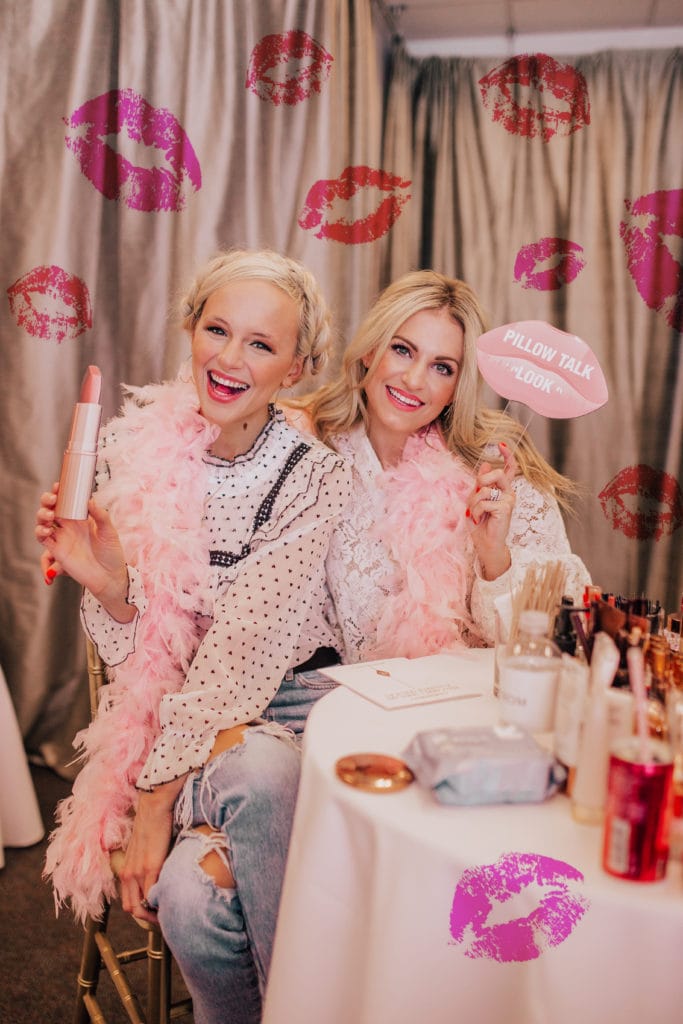
CT Makeup Tips:
- Foundation Matching: They taught us you want to match your foundation to your chest! You don’t want to match to your neck or your cheek. Your head is a hat to your neck, so your neck will always be lighter- and you just dust your bronzer to even the look out. By matching your foundation to your chest, your entire body will match much more evenly!
- Foundation Blending: We all hate the dreaded foundation line! To help avoid that, start your foundation application towards the center of your face. It’s natural to “dot” foundation on different spots of our face and then blend it all together. But by starting at your nose and blending foundation out, you help avoid that line because your foundation is far more thinned out at the jawline.
- Don’t Forget Your Ears: When doing your powder, don’t forget to *lightly* blend over your ears. They mentioned at fashion week, they always make sure models have their ears matching their face. Now they aren’t saying to put foundation over your ears- that’s a bit odd. But just by lightly dusting your brushes over and making sure they match, you avoid any lines!
- Line Your Full Lips: If you are always reapplying your lipstick and wasting product, chances are you aren’t lining your full lip. By lining and filling in your lips, you will reapply lipstick far less, since liner acts as a bonding agent of color to your lips!
- Contour, Highlight, Blush: This is one of the biggest changes I’ve made. They mentioned that the highlight trend kind of removes your blush because we tend to put a really light highlight on top of blush and it falls over it. Then we want to reapply and feel we need more color in our face. But by doing contour, then highlight, and blush as a final step, you keep your face looking bright and warm.
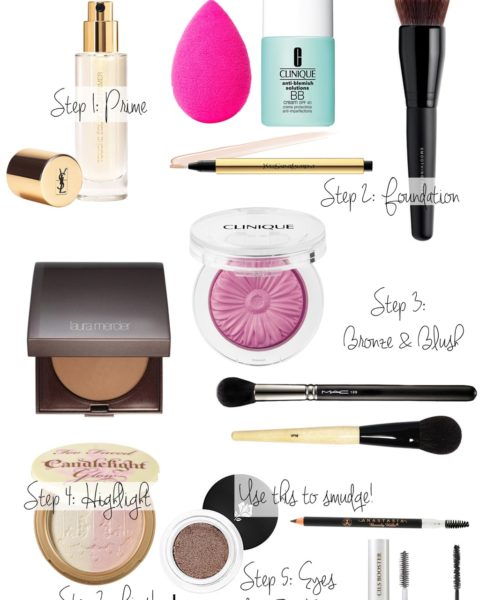
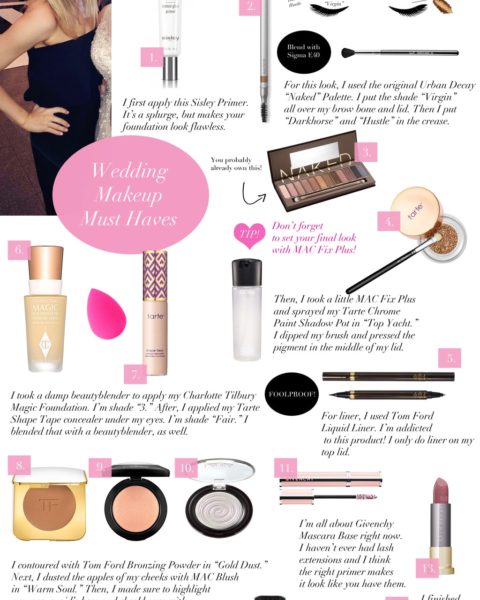
PREP:
Dr. Brandt Hyaluronic Moisturizer + TULA Eye Balm + Skinceuticals Sunscreen
To start my makeup each day, I first apply my Dr. Brandt Moisturizer all over. I apply that first, then put my hair in hot rollers. Next, I put on my TULA eye balm to make my eyes look awake. It takes about 5 minutes for me to place hot rollers and then I apply my sunscreen. The Physical Fusion UV Defense SPF 50 is a lightly tinted sunscreen, so it acts great as a primer to smooth out any hyperpigmentation. On the weekends, I just throw this on all over my skin and go makeup free. I love this sunscreen because it melts into your skin with no residue and you’re just left with a glow!
BROWS:
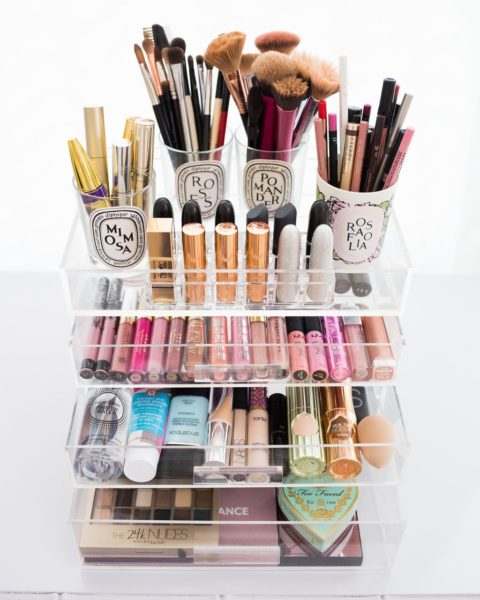
Benefit Goof Proof Brow Pencil+ Sigma Clear Brow Gel
Like mascara, I always try different brow pencils- typically because I’m grabbing them rushed when I’m out of my last one. I’ll think, “Whatever is here will work!” However, one of my absolute favorites is the Benefit Goof Proof Brow Pencil. I’ll use it in the color 2 or 3 and it makes filling in your brows so easy. Once I fill my brows in, I’ve lightly dust some Sigma Clear Brow Gel over which has kept them in place all day.
EYES:
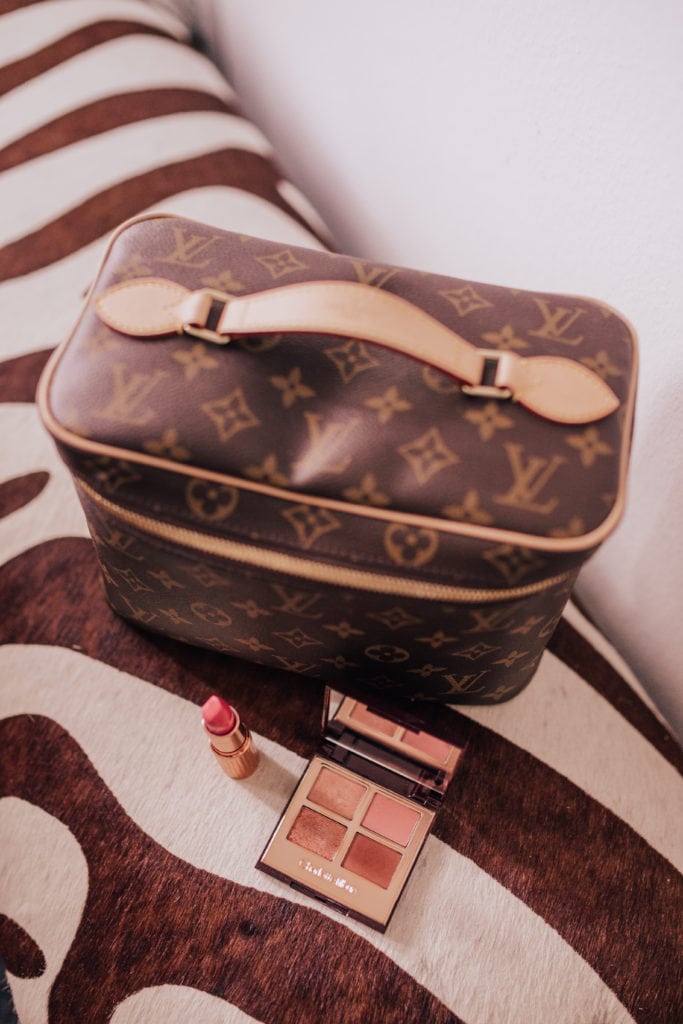
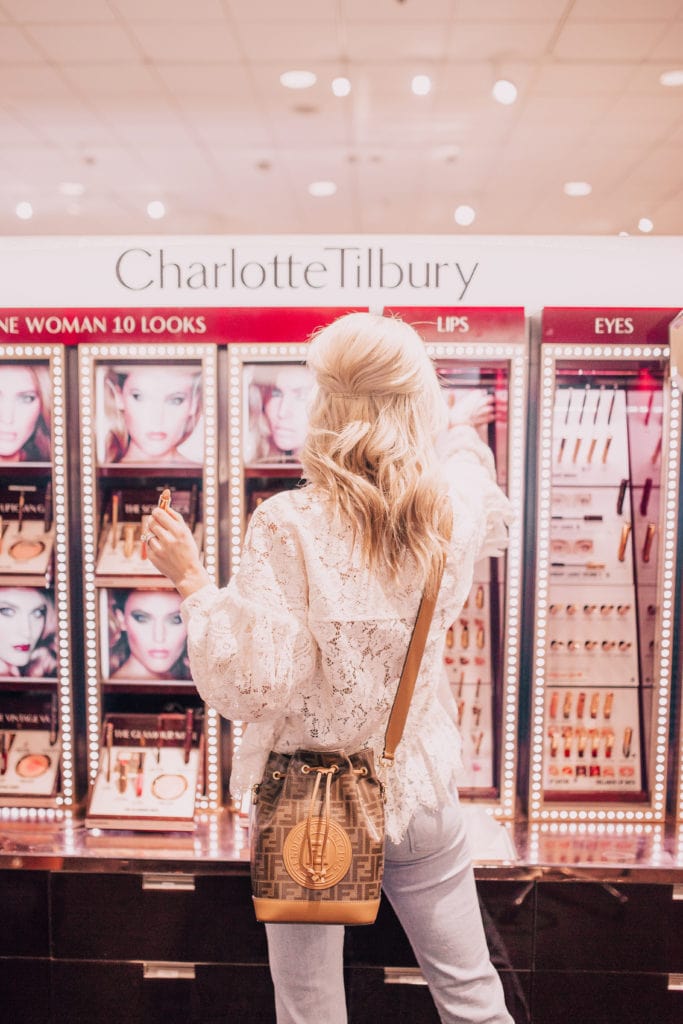
SHADOW: Charlotte Tilbury Pillowtalk Eyeshadow Palette
Customers BEGGED for a Pillowtalk line after CT’s famous lip liner went viral. This quad-shadow set is part of the line, and it’s the perfect balance of versatile and not overwhelming. Sometimes shadow palettes with 28 shadows feel a little overwhelming to me. The shadows work alone, together, and can create everything from an extremely work-appropriate look to a party style. The base is a pinkey-nude nude and you’re given two matte shadows and two shimmers. For explanation purposes, I’ll label the shadows #1,#2,#3,#4- from top left to top right, bottom left and bottom right. You can use shadow #1 as a primer, brow highlight or all-over shade for a natural look. #2 is a great matte look for your entire lid if you also want a work-appropriate option. For my daily look, I like to prime eye with #1 all over, put #2 on the lid and #4 in the crease. If you want to take your look to night, just dab #3 with your ring finger on your lid, as well.
LINER: Tom Ford Liquid Liner + Lancôme Le Crayon Khôl EyeLiner
I always line my top lid with Tom Ford liquid liner– I am addicted to this stuff! It makes lining your eyes so simple and it dries matte, which I adore. I don’t like a shiny liquid eyeliner. Then I line my waterline with the white Lancôme eyeliner. Here is my makeup tutorial video sharing how I do it. The white liner on the bottom opens up my eye and helps me look far more awake.
MASCARA: Lancôme Mascara Primer + L’Oreal Lash Paradise
I do my mascara as the last step before my foundation. The reason I always start with eyes is so my eyeshadow fallout or any extra product doesn’t get on top of foundation. I’ll prime my eyes with the Lancôme Mascara Primer and then use L’Oreal Lash Paradise mascara. These two combined create a false-lash effect! I actually found a great set of the Lash Paradise at Costco. I got 5 of the mascaras for $20 or something- so next time you are at Costco check and see if yours has it!
FACE:
FOUNDATION: Giorgio Armani Luminous Silk
I did a blog post on my foundation rotation here but Luminous Silk always remains my day-to-day option as of late. I’ve been purchasing this foundation for the past 6 years and love it! I’m shade 3.5. It’s a moderate buildable coverage and I think it’s great for normal to dry skin. It’s also oil-free!
CONCEALER: Charlotte Tilbury Magic Away Concealer + Cle De Peau Concealer
I use the CT Magic Away Concealer in shade 1 as my undereye concealer. This gives you a very fresh look and isn’t too heavy at all! However, it does the job of covering circles. If you don’t like the “cakey” undereye look, you will love this. For any blemishes or scars, I love Cle De Peau Concealer. It’s quite a pricey concealer, but nothing beats it. I’ve been buying this for goodness, maybe 8 or 9 years and have yet to find a blemish it can’t cover. I use shade “Ivory.” I only repurchase this once every 2 years- it expires before I have to buy new!
POWDER: ELF High-Definition Powder in Soft Luminous
Traditionally, I live and breathe by Laura Mercier Translucent powder for setting my t-zone. However, I found a great dupe with the Elf High-Definition Powder a few weeks ago! I get the exact same look for $6!
CONTOUR: Charlotte Tilbury Contour Palette
I have tried so many products in order to find something comparable to Tom Ford’s bronzer. This is it! Now, this is a matte contour, while my typical Tom Ford has some shimmer. However, the powder finish and ability to blend is the exact same quality. While the price is nearly identical, this gives you a highlight as well, so it’s a little easier on the wallet. I contour my face, then highlight. I learned at this class to do blush last- which I had been doing wrong. I normally was doing contour, blush, then highlight. Changing this step in my routine has made my face look so much warmer- I love it! If you have a deeper skin tone, here is the CT contour palette for you.
BLUSH: Charlotte Tilbury Cheek to Chic Blush in “First Love”
I purchased this blush when I purchased my Pillowtalk Eyeshadow Palette and love how it’s such a soft shade. It doesn’t feel overpowering, but gives my face that warmth I crave! You aren’t left with harsh lines from contour and blush, it just blends into your skin giving you the “Just left the beach!” look.
LIPS:
PREP: Dr. Brandt Lip Plumper
I love to prep my lips with this lip plumper that I talked about in last week’s blog post! It dries more matte so you can still put on lip liner after and get the effect you want!
COMBINATIONS:
To see the lipstick in a photo, just click the shade!
- LIGHT NUDE: MAC Liner in “Boldy Bare” + Charlotte Tilbury Lipstick in “Kim K W” + Clarins Gloss in 02
- MEDIUM NUDE: Charlotte Tilbury Liner in “Pillowtalk” + Charlotte Tilbury Lipstick in “Pillowtalk“
- PINK: MAC Liner in “Soar” + Charlotte Tilbury Lipstick in “Bosworth’s Beauty” + NYX Gloss in “éclair”
- DRUGSTORE MAUVE: {I still use MAC “Soar” Liner} NYX Liquid Lipstick in “Soft Spoken“
- DRUGSTORE NUDE: {I use MAC in “Boldy Bare“} + Maybelline “Peach Buff” lipstick
- DRUGSTORE PINK: {MAC “Soar” Liner} + Revlon Colorstay in “Ultimate Orchid“
I wish I had a drugstore lip liner recommendation for y’all. I think lip liner is such an integral part of making your lipstick last all day long and not have to constantly reapply and I just can’t find a good one!
I hope this was helpful in breaking down my currently routine for you all. Do you have any great makeup finds as of late?!


So you use your nars brush for contouring still with this contour powder.
Yes ma’am! Don’t think I can ever get rid of that brush- it’s so good! xo, Katey
Love the photos, Katey! You’re glowing! 🙂 ❤️
Charmaine Ng | Architecture & Lifestyle Blog
http://charmainenyw.com
Your makeup is so gorgeous so I can’t wait to try some of your tips! I love the L’Oreal Voluminous mascara as well!
xoxo A
http://www.southernbelleintraining.com
Thanks love!! xo
This most is just my love language. I love it so much. I’m going to buy the skinceutucals sunscreen because that’s exactly what I’ve been looking for !!
Yay babes!! Hope you love it! Also need to text you back!! Have much to update you on! xx, K
love your beauty posts always! I can’t seem to find this blush color online – is this new?
Ahh! Thank you for catching that! I goofed! So sorry! That’s my lipstick color haha. I just changed it. The blush is called “First Love.” xx, Katey
Great post! Thank you for all of your tips. I’m excited to try putting on my blush last. And I still want to get the Tula eye balm.
Regarding drugstore lipliners, If you haven’t tried wet and wild gel lip liners, I think your life will be changed! They’re so cheap they’re practically free, and the mauve is fantastic and all the dark colors are amazing. Buy one in every color, they are truly the best
Hi girl! Okay, I have actually had these on my list to buy for ages!! Where do you find yours?! I can’t ever find them at my drugstores! xx, Katey
curious if you have tried the Charlotte Tilbury Light Wonder foundation? I saw on your posts specifically over foundations you are wearing a cc cream for daily use, and i’ve heard the CT light wonder is similar to a tinted cream / moisturizer. Interested in trying it, thought maybe the covered it in your master class.
Hi Lacey! They didn’t cover it in the class, so I haven’t tried it! 🙁 However, I typically love all CT foundations, so I’ll put that on my list to try! I bet it is wonderful! xx, Katey